Configuring Pinmux and GPIO
This procedure provides a step-by-step guide to generate pinmux-related modification and integrate it into NVIDIA DRIVE? OS PDK.
Contact NVIDIA Hardware application support to request the latest pinmux XLS and follow the steps.
-
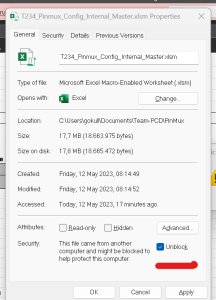
Remove Security Restriction on the Excel by right-clicking File > Properties > Security > Unblock.
-
Open the XLS and click Enable Content.

You will notice multiple tabs in the XLS, and each tab represents one board variant.
-
Select the board variant for which you want to generate the DT.

-
Click Generate DT File on top of the selected tab.
 Note: Ensure that you enable Content and Editing for the Macro Button to work.
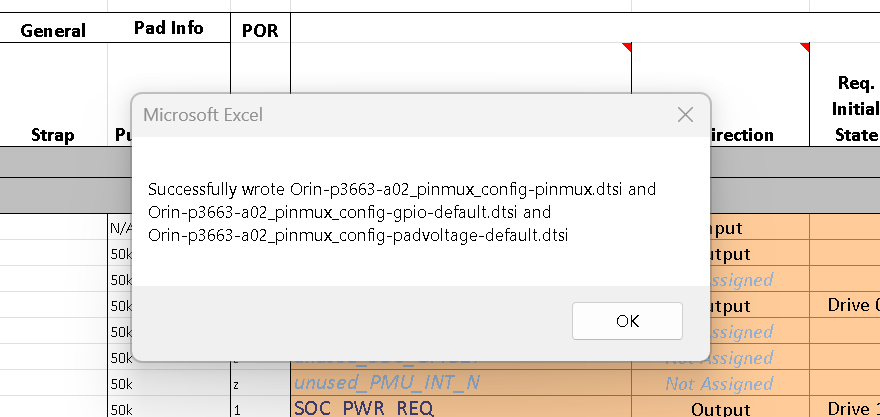
 You might get error messages as shown in the following figure. Continue clicking OK until the messages stop.

-
After clicking OK for all the error messages, click the Generate DT File button again. This will create the dtsi in the same folder where the Excel sheet was saved.
Use SCP to transfer this file to the host machine under the repository of the following path:
<PDK_TOP>/drive-foundation/platform-config/hardware/nvidia/platform/<SOC>/automotive/bct/<BOARD>Compare the existing pinmux dtsi file with the newly generated file by using the
diffcommand, and copy only the relevant ones. Do not make any changes to include at top of the existing file.