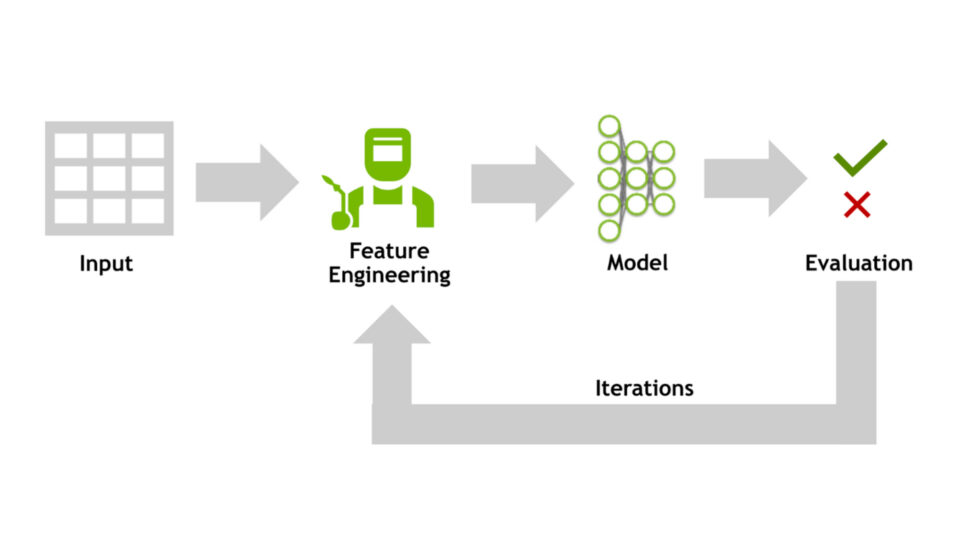
XGBoost 是一種基于決策樹的集成 機器學習?算法,基于梯度增強。然而,直到最近,它還不支持分類數據。分類特征在用于訓練或推理之前必須手動編碼。
在序數類別的情況下,例如學校成績,這通常使用標簽編碼來完成,其中每個類別都分配一個與該類別的位置相對應的整數。等級 A 、 B 和 C 可分別分配整數 1 、 2 和 3 。
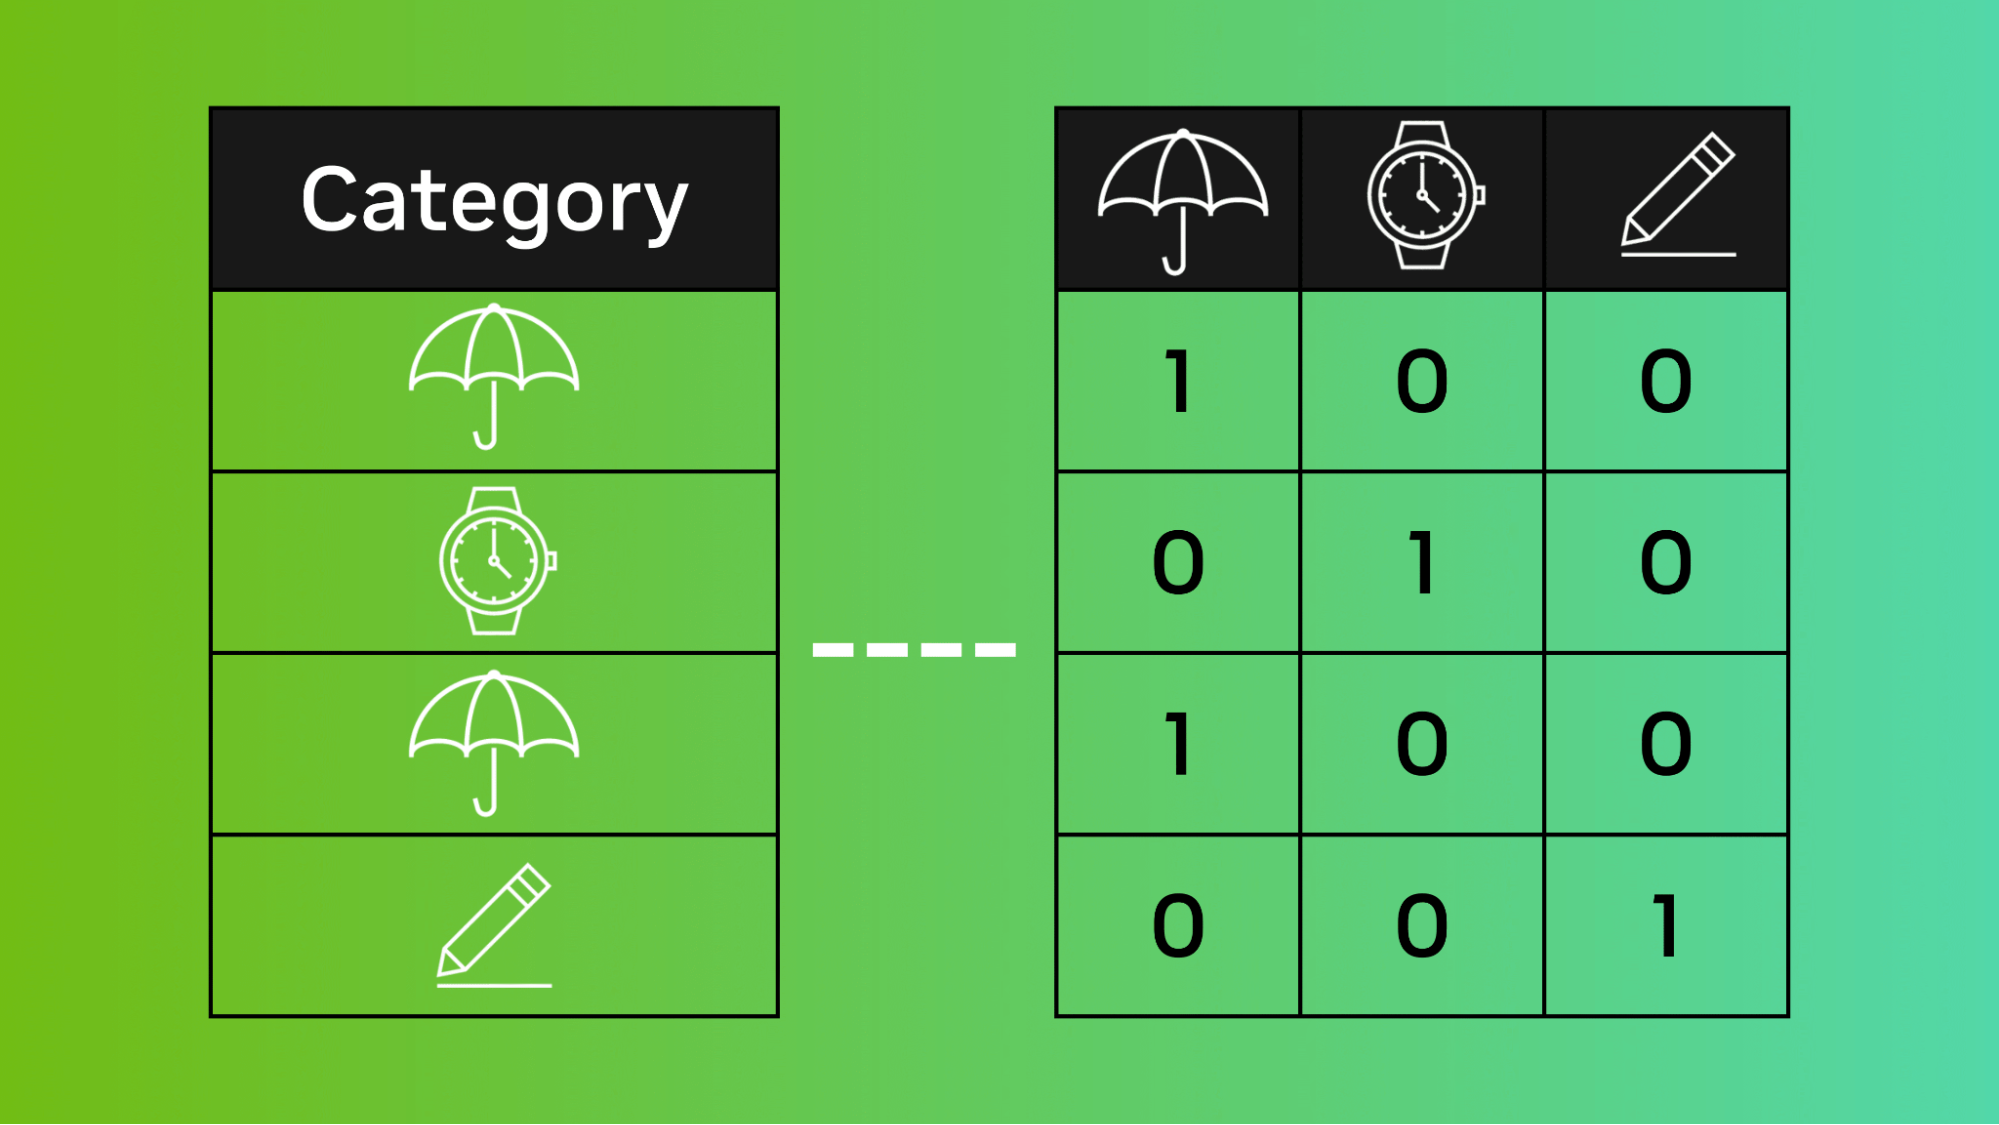
對于基數類別,類別之間沒有序數關系,例如顏色,這通常使用一個熱編碼來完成。這是為類別特征包含的每個類別創建新的二進制特征的地方。具有紅色、綠色和藍色類別的單個分類特征將是一個熱編碼為三個二進制特征,一個代表每種顏色。
>>> import pandas as pd
>>> df = pd.DataFrame({"id":[1,2,3,4,5],"color":["red","green","blue","green","blue"]})
>>> print(df)
  id  color
0   1    red
1   2  green
2   3   blue
3   4  green
4   5   blue

>>> print(pd.get_dummies(df))
  id  color_blue  color_green  color_red
0   1           0            0          1
1   2           0            1          0
2   3           1            0          0
3   4           0            1          0
4   5           1            0          0
這意味著具有大量類別的分類特征可能會導致數十甚至數百個額外的特征。因此,經常會遇到內存池和最大 DataFrame 大小限制。
對于 XGBoost 這樣的樹學習者來說,這也是一種特別糟糕的方法。決策樹通過找到所有特征的分裂點及其可能的值來訓練,這將導致純度的最大提高。
由于具有許多類別的一個熱編碼分類特征往往是稀疏的,因此分割算法 經常忽略 one-hot 特性?有利于較少稀疏的特征,這些特征可以貢獻更大的純度增益。
現在, XGBoost 1.7 包含了一個實驗 特征?,它使您可以直接在分類數據上訓練和運行模型,而無需手動編碼。這包括讓 XGBoost 自動標記編碼或對數據進行一次熱編碼的選項,以及 optimal partitioning 算法,用于有效地對分類數據執行拆分,同時避免一次熱解碼的缺陷。 1.7 版還支持缺失值和最大類別閾值,以避免過度擬合。
這篇文章簡要介紹了如何在包含多個分類特征的示例數據集上實際使用新特征。
使用 XGBoost 的分類支持預測恒星類型
要使用新功能,必須首先加載一些數據。在本例中,我使用了 Kaggle star type prediction dataset 。
>>> import pandas as pd
>>> import xgboost as xgb
>>> from sklearn.model_selection import train_test_split
>>> data = pd.read_csv("6 class csv.csv")
>>> print(data.head())
然后,將目標列(星形)提取到其自己的系列中,并將數據集拆分為訓練和測試數據集。
>>> X = data.drop("Star type", axis=1)
>>> y = data["Star type"]
>>> X_train, X_test, y_train, y_test = train_test_split(X, y)
接下來,將分類特征指定為category數據類型。
>>> Y_train = y_train.astype("category")
>>> X_train["Star color"] = X_train["Star color"].astype("category")
>>> X_train["Spectral Class"] = X_train["Spectral Class"].astype("category")
現在,要使用新功能,必須在創建XGBClassifier對象時將enable_categorical參數設置為True。之后,繼續訓練 XGBoost 模型時的正常操作。這適用于 CPU 和 GPU tree_methods。
>>> clf = xgb.XGBClassifier(
    tree_method="gpu_hist", enable_categorical=True, max_cat_to_onehot=1
)
>>> clf.fit(X_train, y_train)

XGBClassifier(base_score=0.5, booster='gbtree', callbacks=None,
              colsample_bylevel=1, colsample_bynode=1, colsample_bytree=1,
              early_stopping_rounds=None, enable_categorical=True,
              eval_metric=None, gamma=0, gpu_id=0, grow_policy='depthwise',
              importance_type=None, interaction_constraints='',
              learning_rate=0.300000012, max_bin=256, max_cat_to_onehot=4,
              max_delta_step=0, max_depth=6, max_leaves=0,
              min_child_weight=1, missing=nan, monotone_constraints='()',
              n_estimators=100, n_jobs=0, num_parallel_tree=1,
              objective='multi:softprob', predictor='auto', random_state=0,
              reg_alpha=0, ...)
最后,您可以使用您的模型生成預測,而無需對分類特征進行一次熱編碼或編碼。
>>> X_test["Star color"] = X_test["Star color"]
    .astype("category")
    .cat.set_categories(X_train["Star color"].cat.categories)
>>> X_test["Spectral Class"] = X_test["Spectral Class"]
    .astype("category")
    .cat.set_categories(X_train["Spectral Class"].cat.categories)
>>> print(clf.predict(X_test))
[1 0 3 3 2 5 1 1 2 1 4 3 4 0 0 4 1 5 2 4 4 1 4 5 5 3 1 4 5 2 0 2 5 5 4 2 5
 0 3 3 0 2 3 3 1 0 4 2 0 4 5 2 0 0 3 2 3 4 4 4]
總結
我們演示了如何使用 XGBoost 對分類特征的實驗支持,以改善 XGBoost 在分類數據上的訓練和推理體驗。有關更多示例,請參閱以下資源:
我們很高興聽到這個新功能如何讓您的生活更輕松。在接下來的幾個月里,我們將有更多的工作來幫助您更好地理解基于樹的算法的真正本質,這將為您的未來工作帶來巨大的收益。
RAPIDS 團隊始終與開源社區合作,以了解和解決新出現的需求。如果你是一個開源維護人員,對 GPU 加速項目感興趣,可以聯系 GitHub 或 Twitter 。 RAPIDS 團隊希望了解潛在的新算法或工具包將如何影響您的工作。
?
?