Software Setup
Flashing for Emulation
To emulate the performance of other Orin series modules
The Jetson AGX Orin Developer Kit (and Jetson AGX Orin 64GB module) can be used to emulate the performance of other Orin series production modules. Emulation support helps to significantly reduce the time to market by kick starting development for any Jetson Orin production module on the Jetson AGX Orin Developer Kit.
Follow Emulation Flash Configurations page of Jetson Linux r35.1 Developer Guide to flash your developer kit with custom configuration file.
Supported are;
- Jetson AGX Orin 64GB module
- Jetson AGX Orin 32GB module
- Jetson Orin NX 16GB module
- Jetson Orin NX 8GB module
Overview of Two Software Setup Flows
NVIDIA Jetson AGX Orin Developer Kit is designed so that you can complete the initial software setup in a stand-alone manner.
Besides the default stand-alone software setup flow, there is an optional setup flow in which you use a Linux host PC to run NVIDIA SDK Manager to (1) flash an image or/and (2) install JetPack components using the host PC.
Default Setup Flow
Your NVIDIA Jetson AGX Orin Developer Kit comes with its eMMC flash memory pre-flashed with L4T BSP image, so you can boot directory into Ubuntu desktop right out of the box.
Getting Started with Jetson AGX Orin Developer Kit covers this flow.
Optional Flow with Host Linux PC
You can optionally use a separate Linux PC to run NVIDIA SDK Manager to (1) flash the L4T BSP and/or (2) install the rest of the JetPack components.
You may choose to use SDK Manager when, for example;
- You want to flash the base L4T BSP on a different storage medium than the default internal eMMC (such as NVMe SSD or USB thumb-drive)
- You cannot give a direct Internet connection to your Jetson developer kits
Note
For the detail, see "Install Jetson Software with SDK Manager" section of "NVIDIA SDK Manager documentation" .
Read on for instructions on how to use SDK Manager for each usage.
How to install SDK Manager
How to install SDK Manager
Info
To install SDK Manager you need;
-
Ubuntu Desktop 20.04 on x86_64 system (host machine)
- System Memory 8GB
- Free disk space: minimum of 25GB
Check NVIDIA SDK Manager documentation for System Requirements detail.
On your x86-64 PC, click here to download the Debian package file for the latest SDK Manager.
Check
To download (and later run) SDK Manager, you need NVIDIA Developer Program Membership.
Log in or sign up for an NVIDIA account.
The Debian package file is named as
sdkmanager_[version]-[build#]_amd64.deb
, like
sdkmanager_1.7.3-9053_amd64.deb
In the directory where you downloaded the file, issue the following command to install the Debian package.
sudo apt install ./sdkmanager_*-*_amd64.deb
Login and Run SDK Manager
You can launch the SDK Manager either by clicking the icon from Ubuntu launcher, or type the following command in the terminal.
sdkmanager
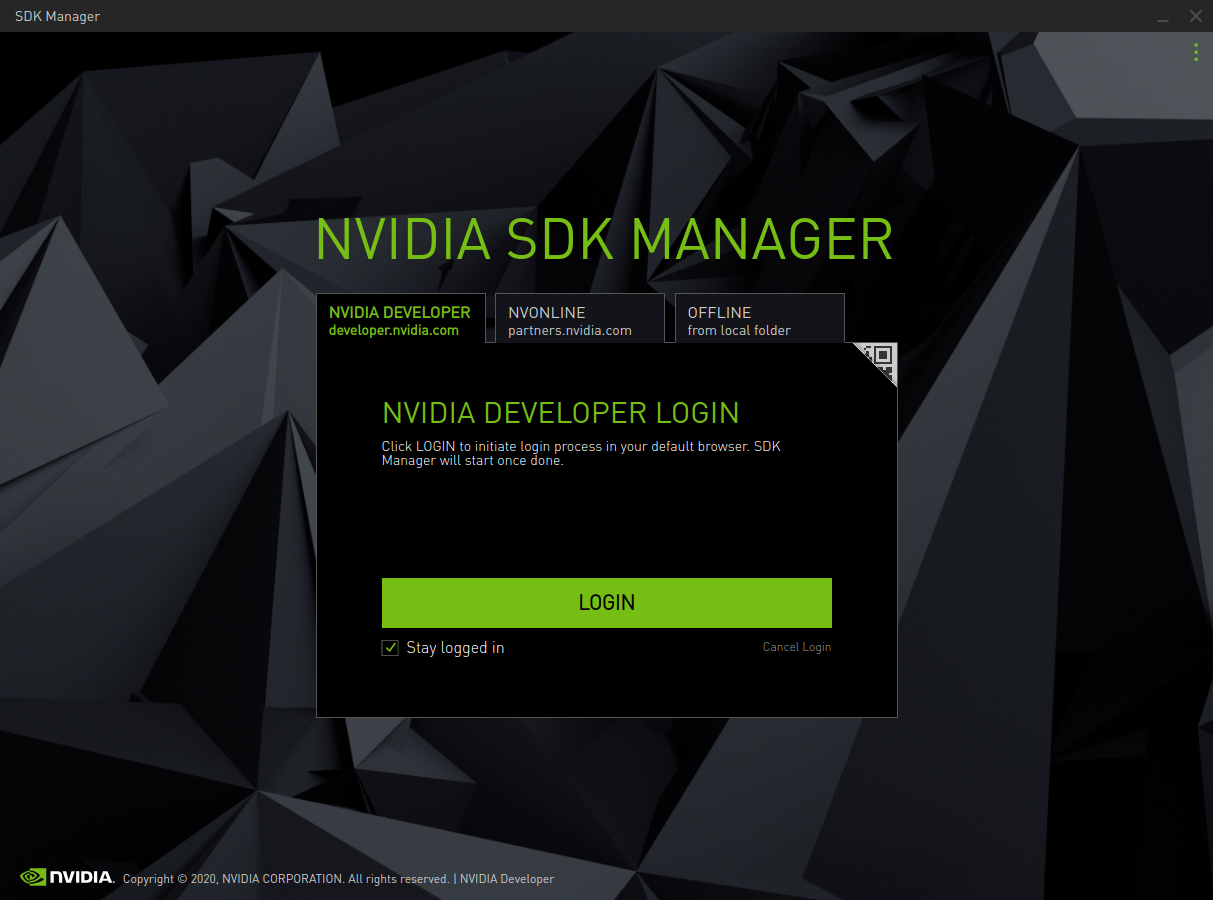
On the initial login screen, click NVIDIA DEVELOPER tab and press LOGIN button. Complete the login process on a web page, then come back to SDK Manager.
Note
For the detail instruction, see Login and Run SDK Manager section of NVIDIA SDK Manager documentation
(1) How to use SDK Manager to Flash L4T BSP
(1) How to use SDK Manager to Flash L4T BSP
Hardware Setup
Connect NVIDIA Jetson AGX Orin Developer Kit to the PC with the bundled USB Type-A to Type-C cable.
Make sure you put the Type-C plug of the cable into the USB Type-C port next to 40-pin connector for flashing.
While holding the middle Force Recovery button (
2
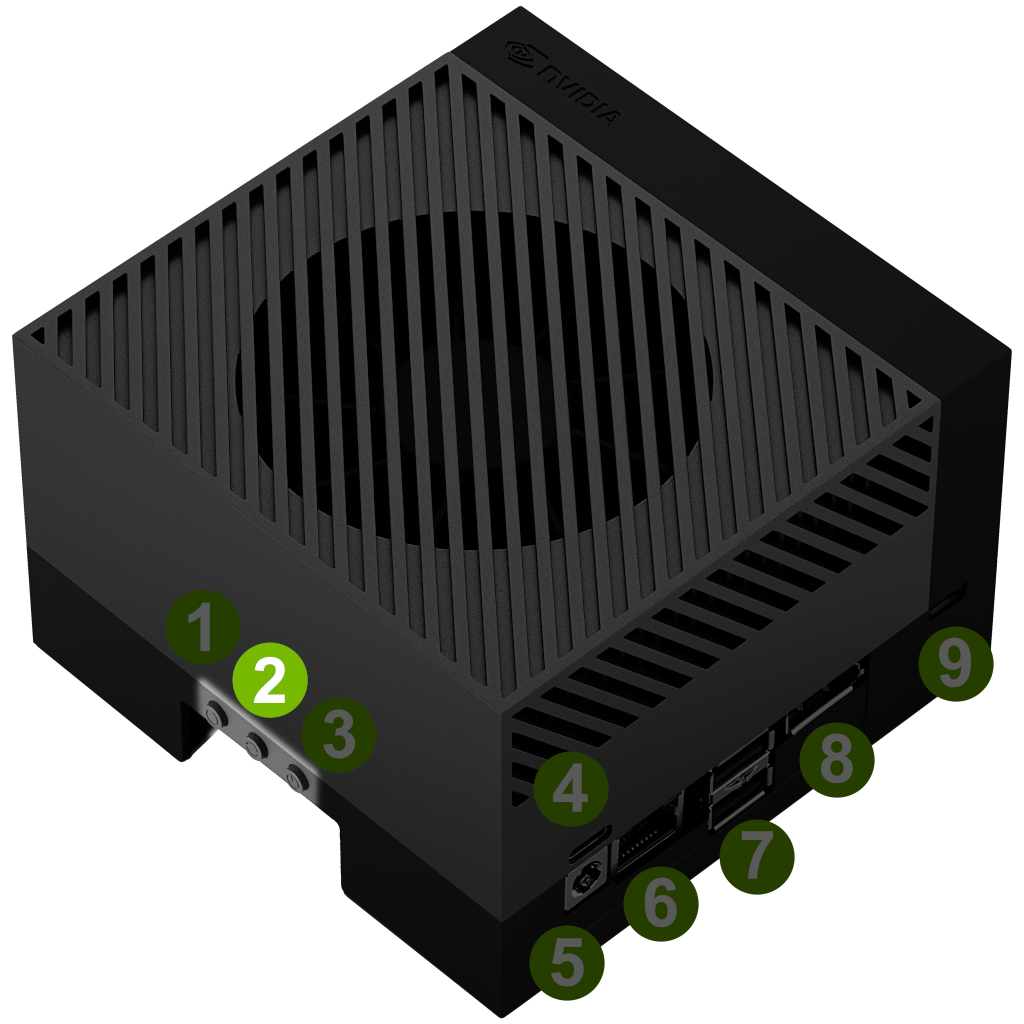 ), insert the USB Type-C power supply plug into the USB Type-C port above the DC jack.
This will turn on the Jetson dev kit in Force Recovery Mode.
Steps
- Launch SDK Manger
-
On the Step 01 Development Environment window;
- From the Product Category panel, select Jetson.
- From the Hardware Configuration panel, de-select "Host Machine" and select Jetson AGX Orin module for Target Hardware.
- Click " CONTINUE " button.
-
- From the Target Components panel, just select " Jetson OS " to install the base L4T BSP, and deselect "Jetson SDK Components".
- Review the license.
- Enable the checkbox to accept the license agreements.
- Click CONTINUE button.
On the Step 02 Details and License window;
Before the installation begins, SDK Manager prompts you to enter your sudo password.
-
Step 03 Setup Process window shows the download progress.
SDK Manager opens a dialog when it is ready to flash your target device. A prompt provides instructions for preparing your device to get it ready for flashing.
-
On the flashing prompt;
- Select "Manual Setup - Jetson AGX Orin" for 1.
- Ignore 7, OEM configuration.
- Select your desired storage device to flash the L4T BSP to for 8, Storage Device.
- Click Flash button.
When flashing is done, the Jetson developer kit will reboot and boot into the L4T BSP.
Yon can complete the OEM Config as described here .
(2) How to use SDK Manager to Install JetPack Components
(2) Use SDK Manager to Install JetPack Components
Hardware Setup
Make sure your NVIDIA Jetson AGX Orin Developer Kit has the base L4T BSP flashed, the Ubuntu system is up and running, and you can login to the system.
While the NVIDIA Jetson AGX Orin Developer Kit is turned on, connect it to the PC with the bundled USB Type-A to Type-C cable.
Make sure you put the Type-C plug of the cable into the USB Type-C port (
10
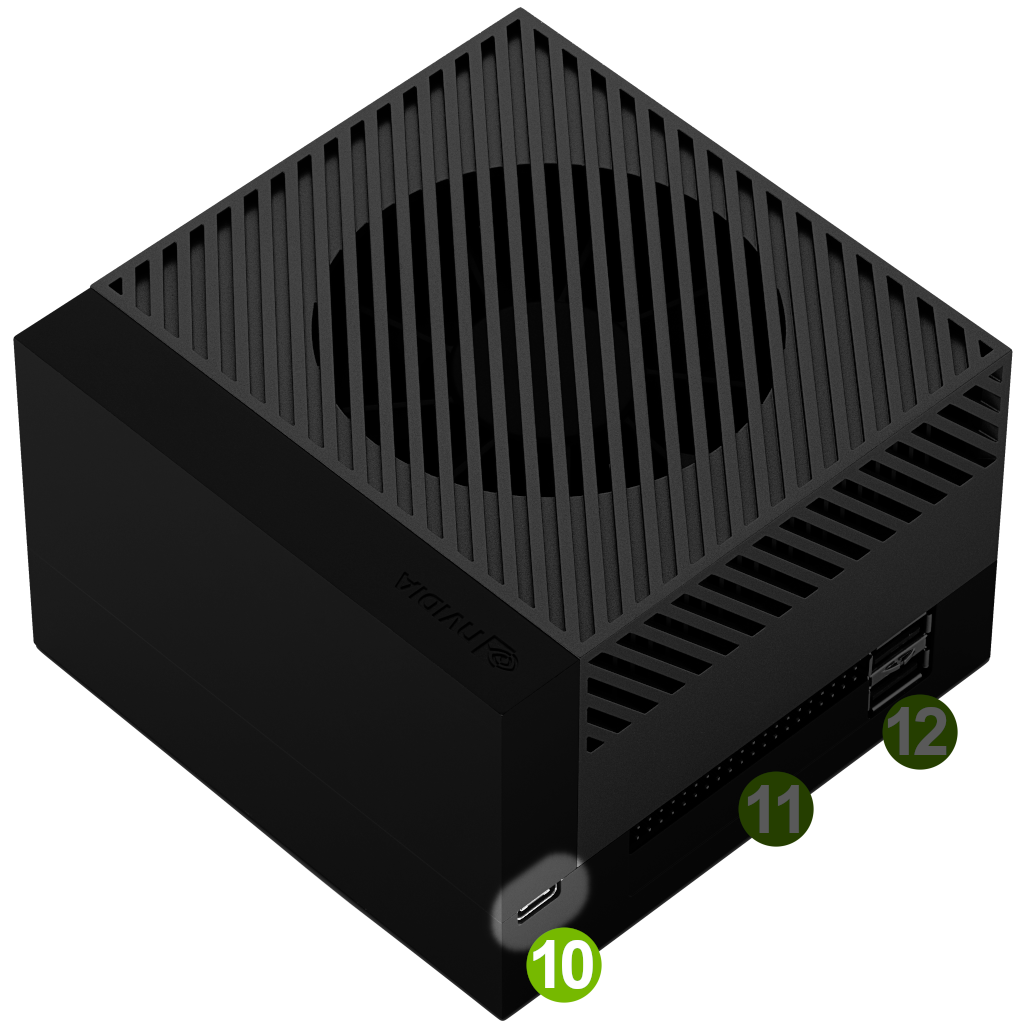 ) next to 40-pin connector for flashing.
Steps
- Launch SDK Manger
-
On the Step 01 Development Environment window;
- From the Product Category panel, select Jetson.
- From the Hardware Configuration panel, de-select "Host Machine" and select Jetson AGX Orin module for Target Hardware.
- Click " CONTINUE " button.
-
On the Step 02 Details and License window;
- From the Target Components panel, de-select " Jetson OS " and select "Jetson SDK Components" to install all the reset of the JetPack components.
- Review the license.
- Enable the checkbox to accept the license agreements.
- Click CONTINUE button.
-
Step 03 Setup Process window immediately bring up a dialog for inputting login information to install JetPack components
- Leave the Connection as "USB".
-
Leave the IPv4 address as
192.168.55.1. - Click " Install " button.
Once the dialog is closed, the download progress ins shows on the Step 03 Setup Process window.